In this section, we will show you how to display data on the user interface in three ways:
Display the properties of a component through an interpolation expression
Pass through
NgForshow array type propertiesPass through
NgIfachieve conditional display
1.5.1. Display the properties of a component through an interpolation expression 
Interpolation is the easiest way to display the properties of a component in the format {{property name}}.
The following code is created based on the Angular 2 TypeScript environment configuration, where you can download the source code and modify the files mentioned below. Note: a template is a multiline string enclosed in backquotes (`), not single quotation marks (‘).
app/app.component.ts
file: ¶ import { Component } from '@angular/core';
@Component({
selector: 'my-app',
template: `
<h1>{{title}}</h1>
<h2>My favorite websites: {{mySite}}</h2>
`
})
export class AppComponent {
title = 'Site List';
mySite = 'Rookie Tutorial';
}
Angular
will be automatically extracted from the component
title
and
mySite
property and is displayed in the browser with the following information
1.5.2. Use
ngFor
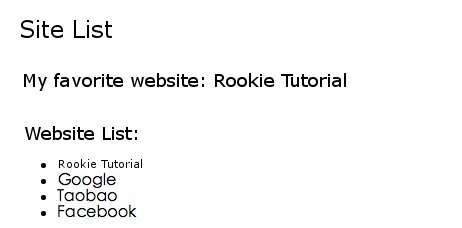
show array properties 
We can also loop out multiple sites and modify the following files: In the code, we use the template After modification, the browser displays as follows: In the instance Next, we are in One with a constructor and two properties are defined in the above code: Then we loop the output. After modification, the browser displays as follows:
app/app.component.ts
file: ¶ import { Component } from '@angular/core';
@Component({
selector: 'my-app',
template: `
<h1>{{title}}</h1>
<h2>My favorite websites: {{mySite}}</h2>
<p>Website List:</p>
<ul>
<li *ngFor="let site of sites">
{{ site }}
</li>
</ul>
`
})
export class AppComponent {
title = 'Site List';
sites = ['Rookie Tutorial', 'Google', 'Taobao', 'Facebook'];
mySite = this.sites[0];
}
Angular
of
ngFor
instruction to display
sites
don’t forget every entry in the list
\*ngFor
leading asterisk (*) in.
ngFor
loops an array, in fact
ngFor
can iterate over any object that can be iterated.
app
create under the directory
site.ts
, the code isas follows:
app/site.ts
file: ¶ export class Site {
constructor(
public id: number,
public name: string) { }
}
id
and
name
the class.
Site
analogous
name
attributes:
app/app.component.ts
file: ¶ import { Component } from '@angular/core';
import { Site } from './site';
@Component({
selector: 'my-app',
template: `
<h1>{{title}}</h1>
<h2>My favorite websites: {{mySite.name}}</h2>
<p>Website List:</p>
<ul>
<li *ngFor="let site of sites">
{{ site.name }}
</li>
</ul>
`
})
export class AppComponent {
title = 'Site List';
sites = [
new Site(1, 'Rookie Tutorial'),
new Site(2, 'Google'),
new Site(3, 'Taobao'),
new Site(4, 'Facebook')
];
mySite = this.sites[0];
}
1.5.3. Pass through
NgIf
make conditional display 
We can use it.
NgIf
to set the data that outputs the specified condition.
In the following example, we judge that if there are more than 3 websites, output the prompt message: modify the following After modification, the browser displays as follows, with an additional prompt at the bottom:
app.component.ts
file, the code is as follows:
app/app.component.ts
file: ¶ import { Component } from '@angular/core';
import { Site } from './site';
@Component({
selector: 'my-app',
template: `
<h1>{{title}}</h1>
<h2>My favorite websites: {{mySite.name}}</h2>
<p>Website List:</p>
<ul>
<li *ngFor="let site of sites">
{{ site.name }}
</li>
</ul>
<p *ngIf="sites.length > 3">You have many favorite websites!</p>
`
})
export class AppComponent {
title = 'Site List';
sites = [
new Site(1, 'Rookie Tutorial'),
new Site(2, 'Google'),
new Site(3, 'Taobao'),
new Site(4, 'Facebook')
];
mySite = this.sites[0];
}