MongoDB provides 64-bit installation packages for all linux distributions, which you can download from the official website.
We need to install each Linux platform dependency package before installation.
Red Hat/CentOS:
sudo yum install libcurl openssl
Ubuntu 18.04 LTS (“Bionic”)/Debian 10 “Buster”:
sudo apt-get install libcurl4 openssl
Ubuntu 16.04 LTS (“Xenial”)/Debian 9 “Stretch”:
sudo apt-get install libcurl3 openssl
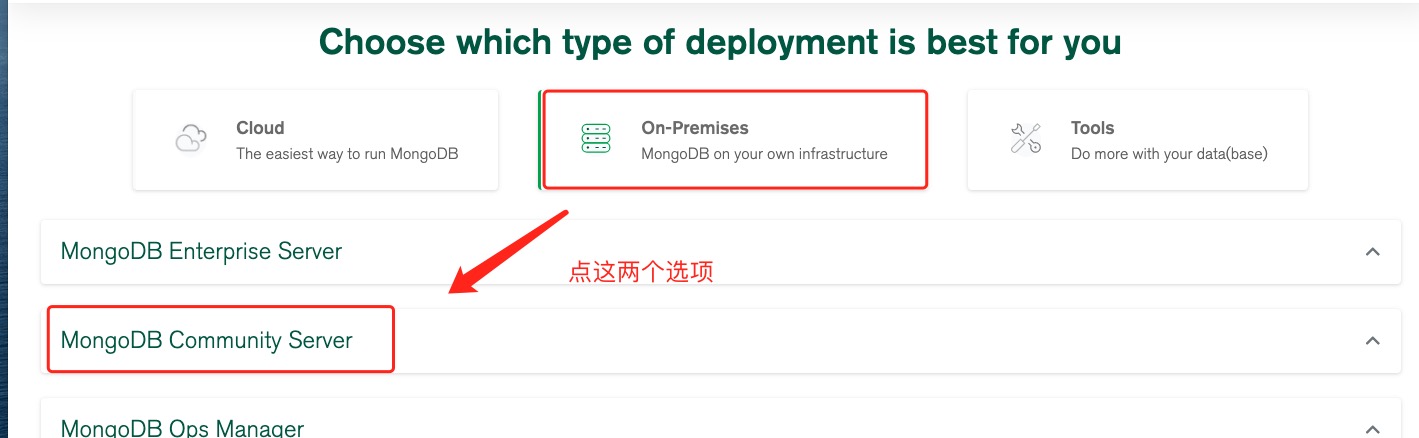
MongoDB source code download address: https://www.mongodb.com/download-center#community
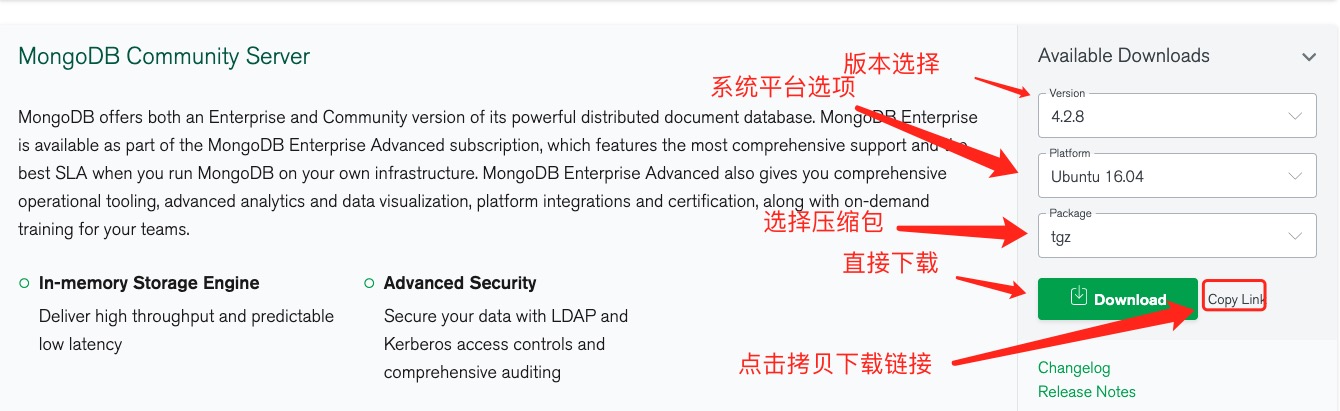
Here we choose tgz to download, download the installation package, and extract it. tgz (the installation on 64-bit Linux is demonstrated below).
wget https://fastdl.mongodb.org/linux/mongodb-linux-x86_64-ubuntu1604-4.2.8.tgz    # 下载
tar -zxvf mongodb-linux-x86_64-ubuntu1604-4.2.8.tgz                                    # 解压

mv mongodb-src-r4.2.8  /usr/local/mongodb4                          # 将解压包拷贝到指定目录
The executable file for MongoDB is located in the bin directory, so you can add it to the PATH In path:
export PATH=<mongodb-install-directory>/bin:$PATH
<mongodb-install-directory> The installation path for your MongoDB. As in this article /usr/local/mongodb4 .
export PATH=/usr/local/mongodb4/bin:$PATH
3.5.1. Create a database directory 
By default, the following two directories are initialized when MongoDB starts:
Data storage directory: / var/lib/mongodb
Log file directory: / var/log/mongodb
Before starting, we can create these two directories and set the current user to have read and write permissions:
sudo mkdir -p /var/lib/mongo
sudo mkdir -p /var/log/mongodb
sudo chown `whoami` /var/lib/mongo     # 设置权限
sudo chown `whoami` /var/log/mongodb   # 设置权限
Next, start the Mongodb service:
mongod --dbpath /var/lib/mongo --logpath /var/log/mongodb/mongod.log --fork
Open the / var/log/mongodb/mongod.log file and see the following message indicating that the startup was successful.
# tail -10f /var/log/mongodb/mongod.log
2020-07-09T12:20:17.391+0800 I  NETWORK  [listener] Listening on /tmp/mongodb-27017.sock
2020-07-09T12:20:17.392+0800 I  NETWORK  [listener] Listening on 127.0.0.1
2020-07-09T12:20:17.392+0800 I  NETWORK  [listener] waiting for connections on port 27017
3.5.2. MongoDB backend manages Shell 
If you need to enter the mongodb background management, you need to first open the bin directory under the mongodb installation directory, and then execute the mongo command file.
MongoDB Shell is an interactive Javascript shell that comes with MongoDB, which is used to operate and manage MongoDB.
When you enter the mongoDB background, it will link to the test document (database) by default:
$ cd /usr/local/mongodb4/bin
$ ./mongo
MongoDB shell version v4.2.8
connecting to: mongodb://127.0.0.1:27017/?compressors=disabled&gssapiServiceName=mongodb
Implicit session: session { "id" : UUID("2cfdafc4-dd56-4cfc-933a-187b887119b3") }
MongoDB server version: 4.2.8
Welcome to the MongoDB shell.
……
Because it is a JavaScript shell, you can run some simple arithmetic operations:
> 2+2
4
> 3+6
9
Now let’s insert some simple data and retrieve the inserted data:
> db.runoob.insert({x:10})
WriteResult({ "nInserted" : 1 })
> db.runoob.find()
{ "_id" : ObjectId("5f069bdb4e02f8baf90f1184"), "x" : 10 }
>
The first command inserts the number 10 into the x field of the runoob collection.
To stop mongodb, you can use the following command:
mongod --dbpath /var/lib/mongo --logpath /var/log/mongodb/mongod.log --shutdown
It can also be found in
mongo
To implement in the command exit of
> use admin
switched to db admin
> db.shutdownServer()
More installation methods can be found on the official website: https://docs.mongodb.com/manual/administration/install-on-linux/