3.27.1. Environment configuration 
If you want to use MongoDB in the Java program, you need to make sure that the Java environment and the MongoDB JDBC driver are installed.
The example of this chapter is suitable for Mongo version 3.x or above.
You can refer to this site. Java教程 To install the Java program. Now let’s check to see if you have a MongoDB JDBC driver installed.
First you must download the mongo jar package, download address: https://mongodb.github.io/mongo-java-driver/ , please make sure to download the latest version.
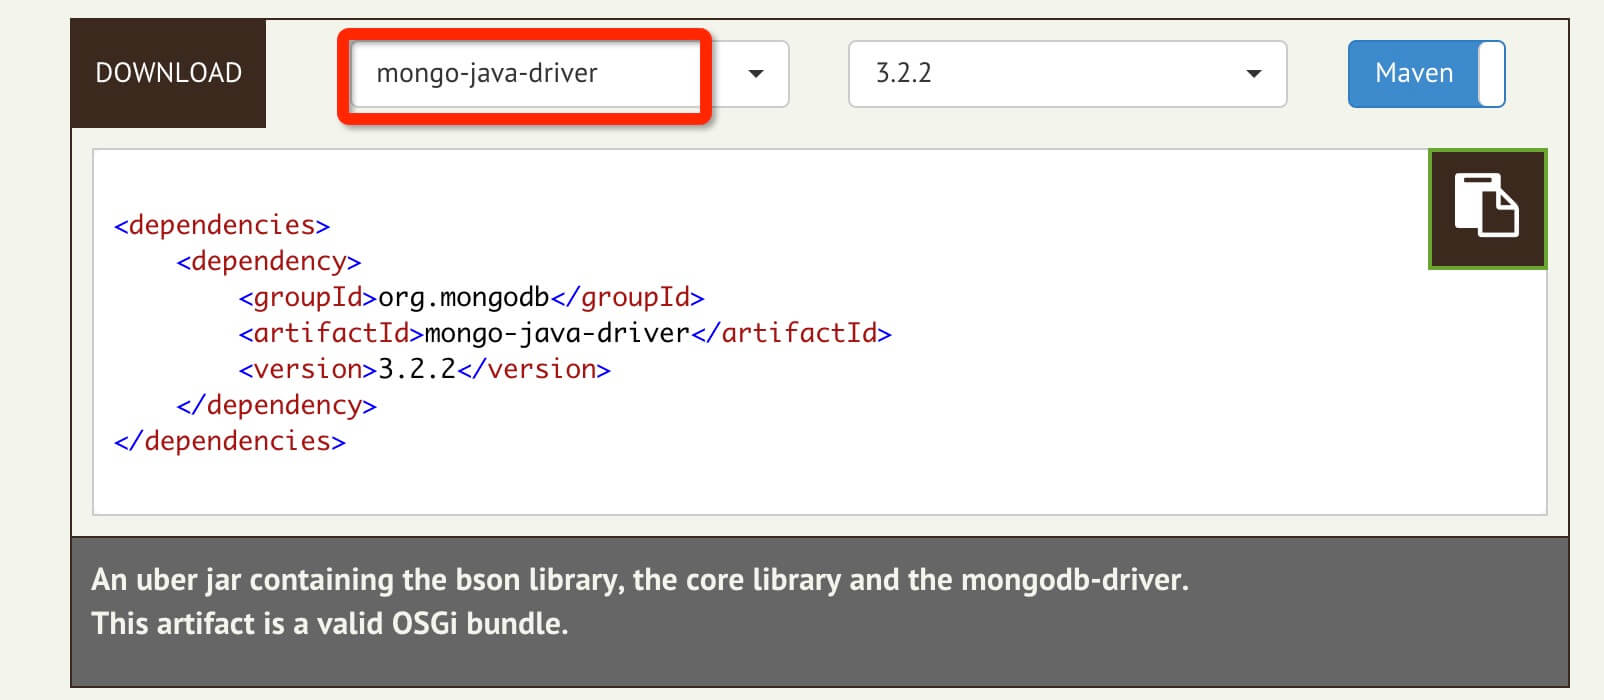
You need to include mongo-java-driver-3.2.2.jar (find the right version) in your classpath.
Domestic mongodb-driver jar download address: http://central.maven.org/maven2/org/mongodb/mongo-java-driver/
3.27.2. Connect to the database 
To connect to a database, you need to specify a database name. If the specified database does not exist, mongo will automatically create the database.
The Java code to connect to the database is as follows:
import com.mongodb.MongoClient;
import com.mongodb.client.MongoDatabase;

public class MongoDBJDBC{
   public static void main( String args[] ){
      try{
       // 连接到 mongodb 服务
         MongoClient mongoClient = new MongoClient( "localhost" , 27017 );

         // 连接到数据库
         MongoDatabase mongoDatabase = mongoClient.getDatabase("mycol");
       System.out.println("Connect to database successfully");

      }catch(Exception e){
        System.err.println( e.getClass().getName() + ": " + e.getMessage() );
     }
   }
}
Now let’s compile and run the program and connect to the database mycol.
You can change the path of the MongoDB JDBC driver according to your actual environment.
This example places the MongoDB JDBC startup package mongo-java-driver-3.2.2.jar in the local directory:
$ javac -cp .:mongo-java-driver-3.2.2.jar MongoDBJDBC.java
$ java -cp .:mongo-java-driver-3.2.2.jar MongoDBJDBC
Connect to database successfully
Authentication: true
In this example, the Mongo database does not require username and password verification. If your Mongo needs to verify your user name and password, you can use the following code:
import java.util.ArrayList;
import java.util.List;
import com.mongodb.MongoClient;
import com.mongodb.MongoCredential;
import com.mongodb.ServerAddress;
import com.mongodb.client.MongoDatabase;

public class MongoDBJDBC {
    public static void main(String[] args){
        try {
            //连接到MongoDB服务 如果是远程连接可以替换“localhost”为服务器所在IP地址
            //ServerAddress()两个参数分别为 服务器地址 和 端口
            ServerAddress serverAddress = new ServerAddress("localhost",27017);
            List<ServerAddress> addrs = new ArrayList<ServerAddress>();
            addrs.add(serverAddress);

            //MongoCredential.createScramSha1Credential()三个参数分别为 用户名 数据库名称 密码
            MongoCredential credential = MongoCredential.createScramSha1Credential("username", "databaseName", "password".toCharArray());
            List<MongoCredential> credentials = new ArrayList<MongoCredential>();
            credentials.add(credential);

            //通过连接认证获取MongoDB连接
            MongoClient mongoClient = new MongoClient(addrs,credentials);

            //连接到数据库
            MongoDatabase mongoDatabase = mongoClient.getDatabase("databaseName");
            System.out.println("Connect to database successfully");
        } catch (Exception e) {
            System.err.println( e.getClass().getName() + ": " + e.getMessage() );
        }
    }
}
3.27.3. Create a collection 
We can use it.
com.mongodb.client.MongoDatabase
In the class
createCollection()
To create a collection
The code snippet is as follows:
import com.mongodb.MongoClient;
import com.mongodb.client.MongoDatabase;

public class MongoDBJDBC{
   public static void main( String args[] ){
      try{
      // 连接到 mongodb 服务
      MongoClient mongoClient = new MongoClient( "localhost" , 27017 );


      // 连接到数据库
      MongoDatabase mongoDatabase = mongoClient.getDatabase("mycol");
      System.out.println("Connect to database successfully");
      mongoDatabase.createCollection("test");
      System.out.println("集合创建成功");

      }catch(Exception e){
        System.err.println( e.getClass().getName() + ": " + e.getMessage() );
     }
   }
}
Compile and run the above program, and the output is as follows:
Connect to database successfully
集合创建成功
3.27.4. Get collection 
We can use it.
com.mongodb.client.MongoDatabase
Analogous
getCollection()
Method to get a collection
The code snippet is as follows:
import org.bson.Document;
import com.mongodb.MongoClient;
import com.mongodb.client.MongoCollection;
import com.mongodb.client.MongoDatabase;

public class MongoDBJDBC{
   public static void main( String args[] ){
      try{
       // 连接到 mongodb 服务
         MongoClient mongoClient = new MongoClient( "localhost" , 27017 );

         // 连接到数据库
         MongoDatabase mongoDatabase = mongoClient.getDatabase("mycol");
       System.out.println("Connect to database successfully");

       MongoCollection<Document> collection = mongoDatabase.getCollection("test");
       System.out.println("集合 test 选择成功");
      }catch(Exception e){
        System.err.println( e.getClass().getName() + ": " + e.getMessage() );
     }
   }
}
Compile and run the above program, and the output is as follows:
Connect to database successfully
集合 test 选择成功
3.27.5. Insert document 
We can use it.
com.mongodb.client.MongoCollection
Analogous
insertMany()
Method to insert a document
The code snippet is as follows:
import java.util.ArrayList;
import java.util.List;
import org.bson.Document;

import com.mongodb.MongoClient;
import com.mongodb.client.MongoCollection;
import com.mongodb.client.MongoDatabase;

public class MongoDBJDBC{
   public static void main( String args[] ){
      try{
         // 连接到 mongodb 服务
         MongoClient mongoClient = new MongoClient( "localhost" , 27017 );

         // 连接到数据库
         MongoDatabase mongoDatabase = mongoClient.getDatabase("mycol");
         System.out.println("Connect to database successfully");

         MongoCollection<Document> collection = mongoDatabase.getCollection("test");
         System.out.println("集合 test 选择成功");
         //插入文档
         /**
         * 1. 创建文档 org.bson.Document 参数为key-value的格式
         * 2. 创建文档集合List<Document>
         * 3. 将文档集合插入数据库集合中 mongoCollection.insertMany(List<Document>) 插入单个文档可以用 mongoCollection.insertOne(Document)
         * */
         Document document = new Document("title", "MongoDB").
         append("description", "database").
         append("likes", 100).
         append("by", "Fly");
         List<Document> documents = new ArrayList<Document>();
         documents.add(document);
         collection.insertMany(documents);
         System.out.println("文档插入成功");
      }catch(Exception e){
         System.err.println( e.getClass().getName() + ": " + e.getMessage() );
      }
   }
}
Compile and run the above program, and the output is as follows:
Connect to database successfully
集合 test 选择成功
文档插入成功
3.27.6. Retrieve all documents 
We can use it.
com.mongodb.client.MongoCollection
In the class
find()
Method to get all the documents in the collection.
This method returns a cursor, so you need to traverse the cursor.
The code snippet is as follows:
import org.bson.Document;
import com.mongodb.MongoClient;
import com.mongodb.client.FindIterable;
import com.mongodb.client.MongoCollection;
import com.mongodb.client.MongoCursor;
import com.mongodb.client.MongoDatabase;

public class MongoDBJDBC{
   public static void main( String args[] ){
      try{
         // 连接到 mongodb 服务
         MongoClient mongoClient = new MongoClient( "localhost" , 27017 );

         // 连接到数据库
         MongoDatabase mongoDatabase = mongoClient.getDatabase("mycol");
         System.out.println("Connect to database successfully");

         MongoCollection<Document> collection = mongoDatabase.getCollection("test");
         System.out.println("集合 test 选择成功");

         //检索所有文档
         /**
         * 1. 获取迭代器FindIterable<Document>
         * 2. 获取游标MongoCursor<Document>
         * 3. 通过游标遍历检索出的文档集合
         * */
         FindIterable<Document> findIterable = collection.find();
         MongoCursor<Document> mongoCursor = findIterable.iterator();
         while(mongoCursor.hasNext()){
            System.out.println(mongoCursor.next());
         }

      }catch(Exception e){
         System.err.println( e.getClass().getName() + ": " + e.getMessage() );
      }
   }
}
Compile and run the above program, and the output is as follows:
Connect to database successfully
集合 test 选择成功
Document{{_id=56e65fb1fd57a86304fe2692, title=MongoDB, description=database, likes=100, by=Fly}}
3.27.7. Update document 
You can use it.
com.mongodb.client.MongoCollection
In the class
updateMany()
Method to update the documents in the collection.
The code snippet is as follows:
import org.bson.Document;
import com.mongodb.MongoClient;
import com.mongodb.client.FindIterable;
import com.mongodb.client.MongoCollection;
import com.mongodb.client.MongoCursor;
import com.mongodb.client.MongoDatabase;
import com.mongodb.client.model.Filters;

public class MongoDBJDBC{
   public static void main( String args[] ){
      try{
         // 连接到 mongodb 服务
         MongoClient mongoClient = new MongoClient( "localhost" , 27017 );

         // 连接到数据库
         MongoDatabase mongoDatabase = mongoClient.getDatabase("mycol");
         System.out.println("Connect to database successfully");

         MongoCollection<Document> collection = mongoDatabase.getCollection("test");
         System.out.println("集合 test 选择成功");

         //更新文档   将文档中likes=100的文档修改为likes=200
         collection.updateMany(Filters.eq("likes", 100), new Document("$set",new Document("likes",200)));
         //检索查看结果
         FindIterable<Document> findIterable = collection.find();
         MongoCursor<Document> mongoCursor = findIterable.iterator();
         while(mongoCursor.hasNext()){
            System.out.println(mongoCursor.next());
         }

      }catch(Exception e){
         System.err.println( e.getClass().getName() + ": " + e.getMessage() );
      }
   }
}
Compile and run the above program, and the output is as follows:
Connect to database successfully
集合 test 选择成功
Document{{_id=56e65fb1fd57a86304fe2692, title=MongoDB, description=database, likes=200, by=Fly}}
3.27.8. Delete the first document 
To delete the first document in the collection, you first need to use the
com.mongodb.DBCollection
In the class
findOne()
Method to get the first document and then use the
remove
Method to delete.
The code snippet is as follows:
import org.bson.Document;
import com.mongodb.MongoClient;
import com.mongodb.client.FindIterable;
import com.mongodb.client.MongoCollection;
import com.mongodb.client.MongoCursor;
import com.mongodb.client.MongoDatabase;
import com.mongodb.client.model.Filters;

public class MongoDBJDBC{
   public static void main( String args[] ){
      try{
         // 连接到 mongodb 服务
         MongoClient mongoClient = new MongoClient( "localhost" , 27017 );

         // 连接到数据库
         MongoDatabase mongoDatabase = mongoClient.getDatabase("mycol");
         System.out.println("Connect to database successfully");

         MongoCollection<Document> collection = mongoDatabase.getCollection("test");
         System.out.println("集合 test 选择成功");

         //删除符合条件的第一个文档
         collection.deleteOne(Filters.eq("likes", 200));
         //删除所有符合条件的文档
         collection.deleteMany (Filters.eq("likes", 200));
         //检索查看结果
         FindIterable<Document> findIterable = collection.find();
         MongoCursor<Document> mongoCursor = findIterable.iterator();
         while(mongoCursor.hasNext()){
           System.out.println(mongoCursor.next());
         }

      }catch(Exception e){
        System.err.println( e.getClass().getName() + ": " + e.getMessage() );
     }
   }
}
Compile and run the above program, and the output is as follows:
Connect to database successfully
集合 test 选择成功
For more operations, please see: http://mongodb.github.io/mongo-java-driver/3.0/driver/getting-started/quick-tour/
Reference document: http://blog.csdn.net/ererfei/article/details/50857103